Pages

Sunday, April 27, 2014

Stampin' Up and a Sketch Challenge

My first sketch challenge!

And, with graduation approaching I decided to kill two birds with one stone and make it a card that could be given to a lucky grad.

The challenge came from: 

Challenge: SFF042514


I’ve never done a challenge before so I hope I’ve followed all the rules and included all the correct links and so on and so forth forever and ever amen.


Sketch Frenzy Friday posts a new challenge every Friday.  I liked looking through all the past challenges for ideas.  Sketches are a great way to think of new cards to make.
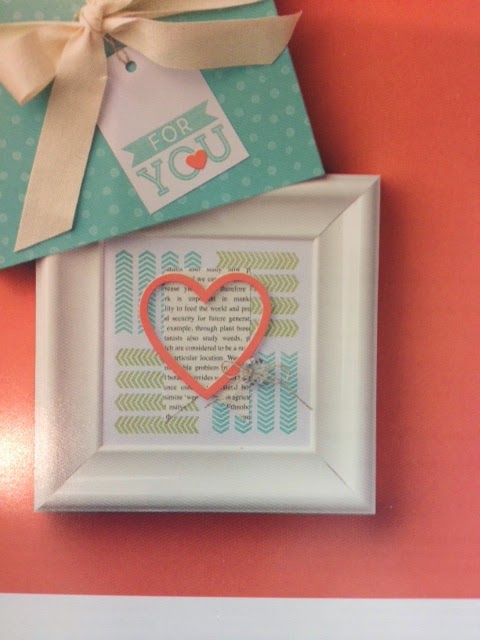

So here's my card:


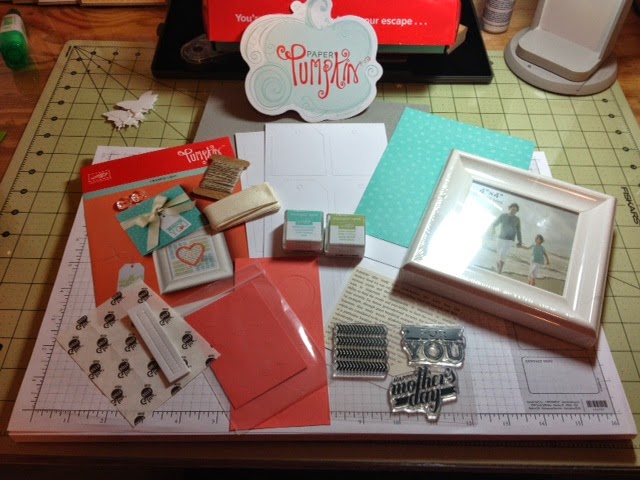
Recognize this Designer Series Paper?  It's from Sycamore Street. It was a set that could be earned during last years Stampin' Up! Sale-A-Bration.  I used Calypso Coral, Island Indigo, and Pool Party classic inks and card stock.  My ribbon and button were from Sycamore Street too.  Sure took me long enough to use them, didn't it?
Stamps sets include Itty Bitty Banners and Hearts a Flutter.  Love these sets.  Hearts a Flutter is about to retire.  <sob>  Pennants were cut with Sizzlets and the Calypso Coral card stock was embossed with Textured Impressions Square Lattice.  If you haven't got yourself a Big Shot yet, you don't know what you're missing! 

If you've never used a sketch, you really should give it a try.  It's basically a blueprint for a card.  This particular card/sketch uses two colors or patterns of paper on the front of the card.  Divide the top and bottom with a ribbon, string, a strip of coordinating paper, a row of rhinestones....possibilities are endless.

Add some pennants or some other type of tags, pennants, strips of paper, embellishments along the bottom of the ribbon towards the right of the card and add a sentiment above the ribbon towards the left of the card.  Instant card!

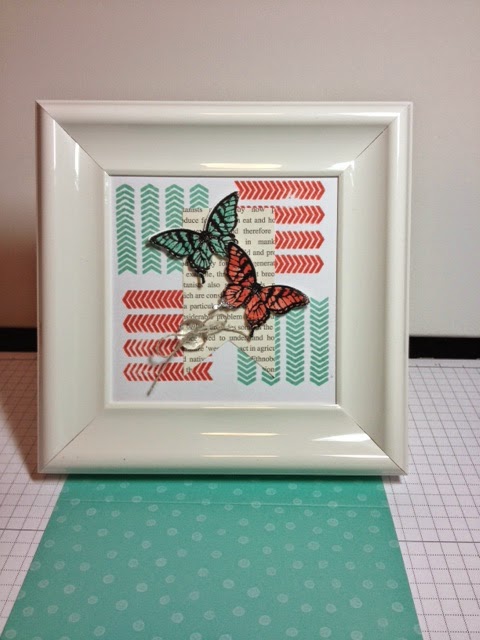
See how they resemble?


When I'm making cards I always make at least two because the most time consuming part for me is deciding on a design.  Now that I have this design I can change it up by changing colors and the sentiment.  It could be a birthday card, thank you card.....you get the idea.


Stampin' Up! colors, coordinated papers and inks always make choosing colors so easy.  The coordinated inks and papers and the quality of their card stock is what drew me to Stampin' Up in the first place so many years ago.

I hope you found something useful on this post.  Check out Sketch Frenzy Friday's blog, try a sketch for inspiration or...make a sketch and inspire someone else!

Happy Stamping!

~Kim

Thursday, April 24, 2014

April Paper Pumpkin

I got my April Paper Pumpkin kit!  I was so excited.  I’ll have to admit I cheated and looked online and found someone who had already received theirs.  So I was pretty sure what it was going to be.

This kit had a lot of cute things in it.  The “plan” was to make a framed picture that could be a Mother’s Day gift if you wanted it to be.  

This is what the picture would look like if you followed the directions.  This is an actual picture of the actual picture that came with the kit.
I wasn’t too big on the heart.  It made me think of Valentine’s Day and I’m past Valentine’s Day and more into spring.  So this is what I decided to make with my kit.
I liked the contrast of the Calypso Coral heart so I decided to use Calypso Coral for two of my stamped images instead of the Pear Pizzazz that came in the kit.

I replaced the heart with two embossed butterflies from Papillon Potpourri which I colored using blending pens.

Cut them out with my butterfly punch.  Attached them with some dimensionals….and viola!  

My own little pretty personalized paper pumpkin picture.

I won't tell you how I struggled to get the dimensional picture to fit behind the glass of the picture frame until I finally read the directions that clearly stated to remove the glass.  (When all else fails, read the directions "sigh".)  Nope, that's my little secret.

What do ya think?  Do you like it?

Want to learn more about Paper Pumpkin?  Here's a link with information.


Friday, April 11, 2014

The New and Improved "Card in a Box"


Remember my “Card in a Box”?  

Well the more I looked at it, the more I didn’t like it.  I know my first attempt at a new type of project is never my best.
But these cards should have a WOW factor, and mine didn’t.  It was just “cool” (yawn).  And “cool” (yawn) isn’t good enough.

So I didn’t mail it…..and it sat in my studio…..and I would look at it…..and look at it…..and not mail it and look at it some more.  And the more I looked at it, the more dissatisfied I became.
Then it hit me!  Add some leaves dummy!  That would add a splash of contrast color….and flowers DO have leaves.  HELLO!!!  (V-8 smack to the head)

So I added some leaves.  And this is the result.  I think it's a huge improvement.  I'm actually going to go ahead and mail it now.  

It's going into the envelope tonight.  

A very large envelope by the way because it turned out to be a very big card.  And bulky too because I used a lot of dimensionals.  (I love dimensionals!)

So here is the end result of my first "card in a box".  Now that I've worked out the kinks and learned a few things, I can't wait to make another one! 

Tuesday, April 8, 2014

The “Card In A Box”

The “Card In A Box”


Oh the procrastination!  Why do I put these things off for so long?  I have been wanting to make a “Card In A Box” since I first lay eyes on one.  I think they’re the coolest thing.  And guess what!  They’re not even hard.  

This little cutie will be mailed to Ohio to bring a Happy Easter message to a very special couple.  I just adore Daffodil Delight!  Any shade of yellow says "Happy" to me.  I used the Flower Shoppe stamp set, and of course the pansy punch.  This card took me less than an hour, and it was my first attempt.  (it always takes me longer the first time to work out the kinks)


It didn't take much paper at all.
I used a 12x12 sheet of Daffodil Delight.  Part of a 12x12 sheet of Garden Gingham and about 1/2 of a 8/12 x 11 sheet of Melon Mambo.  And a little bit of Whisper White for the back and some of the flowers.  The sentiment was cut using the Labels Collection FrameLits and the little flowers on the sentiment were cut with Floral Fusion Sizzlits.  I just love my Big Shot!!!  Added a few rhinestones here and there and SHABAM!!  Instant happiness in a box.

HAPPY EASTER!!


Tuesday, April 1, 2014

I Have a Purple Thumb!

No, I haven't slammed my appendage in a door!  My purple thumb is a good thing.  A purple thumb to an artist is like a green thumb to a gardener.  (And yes, I made that up myself, but I kinda like it.)

You see, I'm a teacher, and each team at our school is responsible for donating a silent auction item for our district's annual gala.  Our teams donation is a "gift card tree".  Since it was my idea, naturally, I was in charge of making the tree.  (Fun, fun, fun!!! and that's not sarcasm)

Here's what I managed to create:

I think it turned out cute.

So what does this have to do with a purple thumb?  Well, I'm a very messy paper artist.  And to make matters worse, I like being messy.  Just like a gardener doesn't mind getting dirt under her fingernails...I have no problem getting glue and ink all over my hands.

After stamping the flowers that I glued to the branches of my tree onto Melon Mambo card stock with Rich Razzleberry ink.....er.....you guessed it....my thumb was pretty much Rich Razzleberry colored.  AND I WAS SO EXCITED ABOUT IT!!

Like I said in my last post, I'm a "Born Again Stamper".  And when I noticed my thumb and fingers were stained in Rich beautiful purply Razzleberry, I knew I was back!  
Ink stained hands, glue smeared jeans, a couple of those Dimensions paper thingies that you peel off stuck in my hair, and I'm a paper artist again!!  

HALLELUJAH!

I think the Rich Razzleberry and Melon Mambo made a great combination.  I love the Flower Shop stamp with the matching punch.  It made the flowers so easy.  I added rhinestones, because......well..... they're shiny.....and I like shiny things.  Then to dress up the (Dollar General shhhhh, don't tell) bucket, I made a quick banner with my Perfect Pennants Bigz L die.

Does anyone remember when we used to make flowers from egg cartons?  

We've come a long way baby!!!


When I was going through my embellishments I found some old Earth Elements buttons in my stash from back before I "strayed" from stamping.  I had forgotten about those colors.  I think they were replaced with Neutrals.  I definitely need to order some new buttons. Oh darn.  (snicker snicker)